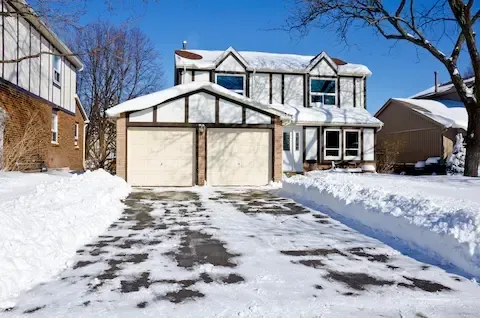
Pre-Storm Driveway Prep Steps for Danbury CT Homeowners
Pre-storm driveway prep in Danbury, CT means completing a short checklist before snow begins: mark your driveway edges with reflective stakes, move vehicles out of the plow path, apply an ice-prevention treatment to flat zones and the apron near the road, clear loose debris that could jam equipment, and confirm your service window with your snow removal crew. Danbury winters can shift fast—a nor'easter that starts as light flurries can drop six inches before morning. Getting these steps done the afternoon before a storm keeps your crew efficient and your driveway safe from the first flake to the last pass.
Step 1: Mark Your Driveway Edges With Reflective Stakes
Plow operators work in low visibility and dark conditions. Without edge markers, blades clip lawn edges, nick pavement borders, or push snow onto landscaping. Drive reflective orange or yellow driveway stakes into the ground every eight to ten feet along both sides of your driveway before the storm arrives. In Danbury neighborhoods like Stadley Rough or Pembroke, driveways often have gradual curves or decorative edging that is easy to miss under two inches of fresh snow. Stakes cost a few dollars and prevent hundreds in lawn or hardscape repair. Set them before the ground freezes solid—once temperatures drop below 25°F, driving stakes becomes difficult.
Step 2: Move All Vehicles Out of the Plow Lane
A parked car forces a plow to work around it, which always leaves uncleared patches and adds time to your service window. Move every vehicle to the street, into a garage, or to a temporary parking spot before the storm begins. If street parking in your area is restricted during snow emergencies—which Danbury enforces on designated routes—check the city's snow emergency declaration page before you move vehicles to the curb. A cleared, unobstructed driveway allows the operator to make full-width passes in one or two runs, which reduces your turnaround time and lowers the chance of snow being pushed back across cleared sections.
Step 3: Apply a Pre-Treatment to Ice-Prone Zones
Liquid brine or granular calcium chloride applied before snow falls prevents bonding between ice and pavement. Focus on your driveway apron—the flat section where your driveway meets the road—and any low-lying spots where water pools. These areas freeze first and are the hardest to clear mechanically once ice bonds to the surface. Calcium chloride works down to around -25°F and is available at hardware stores throughout Danbury. Apply it lightly; heavy application on slopes can create runoff that harms nearby plantings. For Driveway Snow Clearing services that include pre-treatment, confirm with your provider what product they use and whether it is safe for your pavement type.
Step 4: Clear Loose Debris and Portable Obstacles
Plow blades catch anything left on pavement—garden hoses, extension cords, basketball hoops, doormats, and loose gravel all become hazards when buried under snow. Walk your driveway and apron area the afternoon before a storm and remove anything that does not belong. Check the edges for stored items like potted plants or firewood stacked near the pavement. In areas like Shelter Rock or around the Lake Kenosia neighborhood, driveways that slope or have tight side clearances are especially prone to debris accumulation near the edges. A five-minute sweep before a storm prevents equipment damage and keeps your service running on schedule.
Step 5: Confirm Your Service Window and Access Instructions
Contact your snow removal provider the day before a forecasted storm and confirm your scheduled service window. Ask whether they plow during the storm, after accumulation hits a trigger depth, or only after snow stops. Danbury storms vary—some drop steady light snow over twelve hours, others deliver heavy bursts followed by sharp temperature drops that refreeze cleared surfaces quickly. Knowing when your crew plans to arrive lets you time vehicle removal and pre-treatment correctly. Leave a note at the gate if access requires a code, or ensure a side gate is unlocked. Read about Driveway Snow Clearing Standards to understand what a professional service pass should include so you can set accurate expectations before the season starts.
Step 6: Check Drainage and Downspout Clearance
Clogged downspouts that discharge onto your driveway create ice sheets overnight. Before the storm, verify that downspouts are directing water away from paved surfaces. If a downspout empties at the edge of your driveway, consider redirecting it or adding an extension to carry water further into the yard. Danbury's freeze-thaw cycle through January and February means water that sits on pavement in the afternoon can become a solid ice patch by midnight. Addressing drainage before the storm is a simple step that reduces post-storm ice management significantly.
Step 7: Have Sand or Traction Grit Ready for the Walkway Approach
Even after a plow clears the main surface, the walkway from your car to your door remains a hazard. Keep a bucket of sand, traction grit, or non-clumping cat litter near your side door so you can apply it immediately after the first plow pass without waiting for additional treatment. This is especially relevant for Danbury homeowners with pitched entry steps or flagstone pathways that shed ice-melt product quickly. Sand provides traction without chemical risk to pets or plantings and works in temperatures where salt products lose effectiveness.
